| Preparing
The Seed Bed
Planting
a new lawn from scratch can be a big job - especially
if it's a big lawn. if your lawn is to be over
5,000 square feet you may want to tackle planting
it in sections, which is easier on the back and
the budget. Start with the the most visible lawn
areas; then make plans to tackle other areas the
following year. This keeps the job manageable
and makes the critical step of watering more feasible
for homeowners who do not have in-ground sprinkler
systems. You will need to take the following steps
no matter which grass-planting method you choose.
Remove
Old Turf and Weeds if Necessary
Many choose to use an herbicide to kill unwanted
grass and weeds to the roots. Select an herbicide
that degrades quickly (that does not last long
in the environment), such as glysophate (Roundup).
Mix according to the manufacturer's directions,
and completely cover all grass plants and weeds
with the solution. Work on a windless day when
the temperature is above 60 degrees F, and take
care not to overspray on garden plants. Glysophate
is a potent, nonselective herbicide that will
kill or severely injure all foliage it touches.
Wear clothing that covers your skin completely,
as well as eye protection, when applying this
or any other herbicide. Afterwards, take a shower
and wash clothing separately.
You
may find that it takes several applications of
glyphosate to get the job done - particularly
if you are trying to eleminate common bermuda.
If the turf has not completely died after 3 weeks,
reapply the herbicide and wait 7 days after the
last application before tilling the dead turf
into your soil. Take care to follow the manufacturer's
safety precautions.
Mechanical
(manual or power) removal of undesirable turf
is the fastest way to get the job done without
needing to worry about kids or pets contacting
herbicides or tracking them into your house. For
small lawns, a grape (grubbing) hoe is a terrific
tool for removing turf. Anyone with a strong back
and a helper to cart away the old turf pieces
can remove up to 300 square feet in an hour. For
large lawns, consider renting a sod cutter. It
slices under the grass, enabling you to pull up
strips of old turf. Make the job easier by cutting
sod while the lawn is moist. Follow up with tilling
to alleviate compaction and to prepare the soil
for the amendments you'll mix in later. Another
method of turf removal, turning existing turf
into the soil with a tiller or cultivator, is
not recommended. Only the most heavy-duty tillers
are suited for "busting sod." And raking
out the pieces of turf after they've been turned
under is frustratingly difficult.
Fix
Grade Problems
Before adding amendments to the soil, fix any
existing grade problems. Although grading often
requires help from a landscaping contractor with
heavy equipment, minor problems can be fixed by
the ambitious do-it-yourselfer. Small versions
of earth-moving equipment are often available
for rent.
The
first rule of grading is that the ground should
slope away from your house in all directions so
that it drops at least 2 or 3 inches for every
ten feet. Sometimes this is not possible to achieve,
so just make sure that the grade slopes away from
your house. The finished grade should also end
up matching the level of existing fixtures, such
as permanent walks and patios, as well as areas
of lawn that are not being replanted. This takes
some figuring. If you will be replanting with
seed and adding one inch of amendments, grade
so that the level is one inch lower than fixtures.
If you will be replanting with sod and adding
an inch of amendments, the grade should be about
two inches lower than your fixtures. Your goal
is to have the finished grade - after the sod
has been planted and amendments added - even with
the level of your fixtures.
When
grading first focus on any problem aeas; low and
high spots. Make adjustments by scraping away
high areas and filling in low areas. Keep a pile
of good topsoil around to spread over any areas
where sub-soil has been exposed. Spread two inches
of the reserved topsoil over the subsoil, and
till it into the first two inches of subsoil.
This will help prevent drainage problems between
the two layers of soil. Lastly, spread the rest
of your topsoil, which should make up at least
another 4 inches. If you need to add topsoil,
buy a screened topsoil that's free of debris,
such as roots or stones. A landscaping rake is
the best tool for working topsoil to the proper
grade if you're doing it yourself.
The
maximum slope in a lawn should be 12 inches for
every 4 feet. If the drop is greater than 12 inches,
you should plan to build a low retaining wall
or cover the slope with a hardy ground
cover or ornamental
grass.
Amend
the Soil
Don't put away or return the tiller yet. Now is
your chance to add amendments such as fertilizer,
organic matter, and lime or sulfur. The opportunity
probably won't come again, so don't skimp. The
right way to proceed is to add recommended amendments
according to the results of your soil test. To
have your soil tested, send your samples to the
local Cooperative Extension Service. The typical
recommendations for every 1,000 square feet of
new lawn include about two pounds of actual (elemental)
phosphorus and potassium; 50 to 100 pounds of
lime (in areas with acidic soil - excluding Centipede
and St, Augustine), and 3 - 6 cubic yards of organic
matter (such as Claycutter or Mushroom Compost)
per 1,000 square feet. Recommendations will vary
depending on your soil's nutrient, organic matter,
and pH levels and on your soil type. We usually
use a good starter fertilizer for bermuda, zoysiagrass,
and fescue, and 5-10-15 for Centipede or St. Augustine.
Milorganite fertilizer
is an excellent natural alternative. To be sure,
consult with your Cooperative Extension Service.
Ensure
even application of amendments by dividing the
recommended amounts in half and applying half
while walking in one direction and the other half
while walking in a perpendicular (opposite) direction.
Once you have applied the amendments, till them
into the top 6 inches of soil.
If
an overabundance of weeds was one of your reasons
for redoing this section of lawn, allow the many
weed seeds in the turned soil to sprout. If you
rake through or till under the weed seedlings,
you can eliminate most annual weeds.
Rake
Smooth and Firm
Rake the area to be replanted until it's smooth.
Remove any stones larger than a 1/2 inch in size
and vegetative matter brought to the surface during
tilling.
Whether
you're planting seed or sod, it's helpful to roll
the prepared soil to provide a firmer base on
which to work and to foster adequate soil structure.
For example, seed planted in soil that is too
loose generally ends up being planted too deeply.
The tiny plants may die before they reach the
surface. Fill a lawn roller about 1/3 full of
water for this job, and roll the soil until your
footprints are no deeper than 1/2 inch.
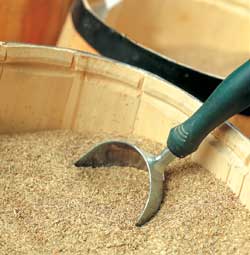
Planting The Seed
Apply
a starter fertilizer to the prepared surface,
but do not till it in. Then spread the best seed
you can afford at the rate recommended by the
seed packager, usually given in pounds per 1,000
square feet. Refer to the seed rate chart below.
GRASS
TYPE |
Seeds
per 1,000 sq ft |
| Bermuda
(Turf-Type) |
2
pounds per 1,000 sq ft |
| *Centipede |
*1
to 2 pounds per 4,000 sq ft |
| Fescue
(Turf-Type) |
6-8
pounds per 1,000 sq ft |
*
When
planting a Centipede lawn from scratch it will
be necessary to blend the Centipede seed with
Bermuda or fescue seed. We recommend blending
1 pound of Centipede seed with 4 pounds of Bermuda
and broadcasting with a hand-held spreader that
has micro setting for spreading small seed. Centipede
lawns from scratch may take two growing seasons
to fully establish themselves enough to cover
the lawn area. Goood thing is: Centipede chokes
out every other kind of grass, including Bermuda,
as well as most weeds.
When
spreading grass seed make two passes, first in
one direction and then in a perpendicular (opposite)
direction, to ensure even coverage. If you don't
want to purchase a hand-held spreader (cost about
$10-15) for spreading smaller grass seeds such
as Bermuda and Centipede, and would rather use
your walk-behind or larger rotary spreader, bulk
up seed with dry sand or vermiculite.
Follow
up with a light raking to work the seed into the
top 1/8 inch of soil; a light rolling with an
empty roller will ensure good seed contact with
the soil.
Finally,
cover the seeded area with a light coat of wheatstraw
or hay to help retain needed moisture and reduce
erosion. A thicker coat of straw may be necessary
on steeper slopes.
Seeding
sloped areas is difficult because the seed tends
to run to low points when it rains. One solution
is to contract with a landscaper who has hydroseeding
equipment. Hydroseeding involves spraying a suspension
of fertilizer, mulch, and water onto the prepared
surface. Make sure that the contractor uses the
specific type of seed that you want planted. Apply
frequent light waterings to hydroseeded surfaces
to keep them from drying out.
SEE
ALSO:
|